Youtube will be the death of me…
I’m pretty conflicted about this project, which concerns my philosophy about 3D printing. I firmly believe that while 3D printing is a fantastic technology that enables your average person to create things we couldn’t dream about ten years ago, it also creates a large amount of plastic waste.
I’ve come across entire YouTube channels whose sole purpose seems to be printing useless junk that will end up in a landfill. (and no, PLA is not biodegradable except in large industrial compost operations, which you may not have locally. See;
https://www.youtube.com/watch?v=jCsnVp6mEbk
https://youtu.be/tavrkWrazWI?si=BKkiZzy-QBGHK_8c
etc.)
Without ranting too much, when working on a project, I try to print in such a way I create as little waste as possible. Even if something comes out a bit wonky, as long as it is mostly functional, that’s good enough for me.
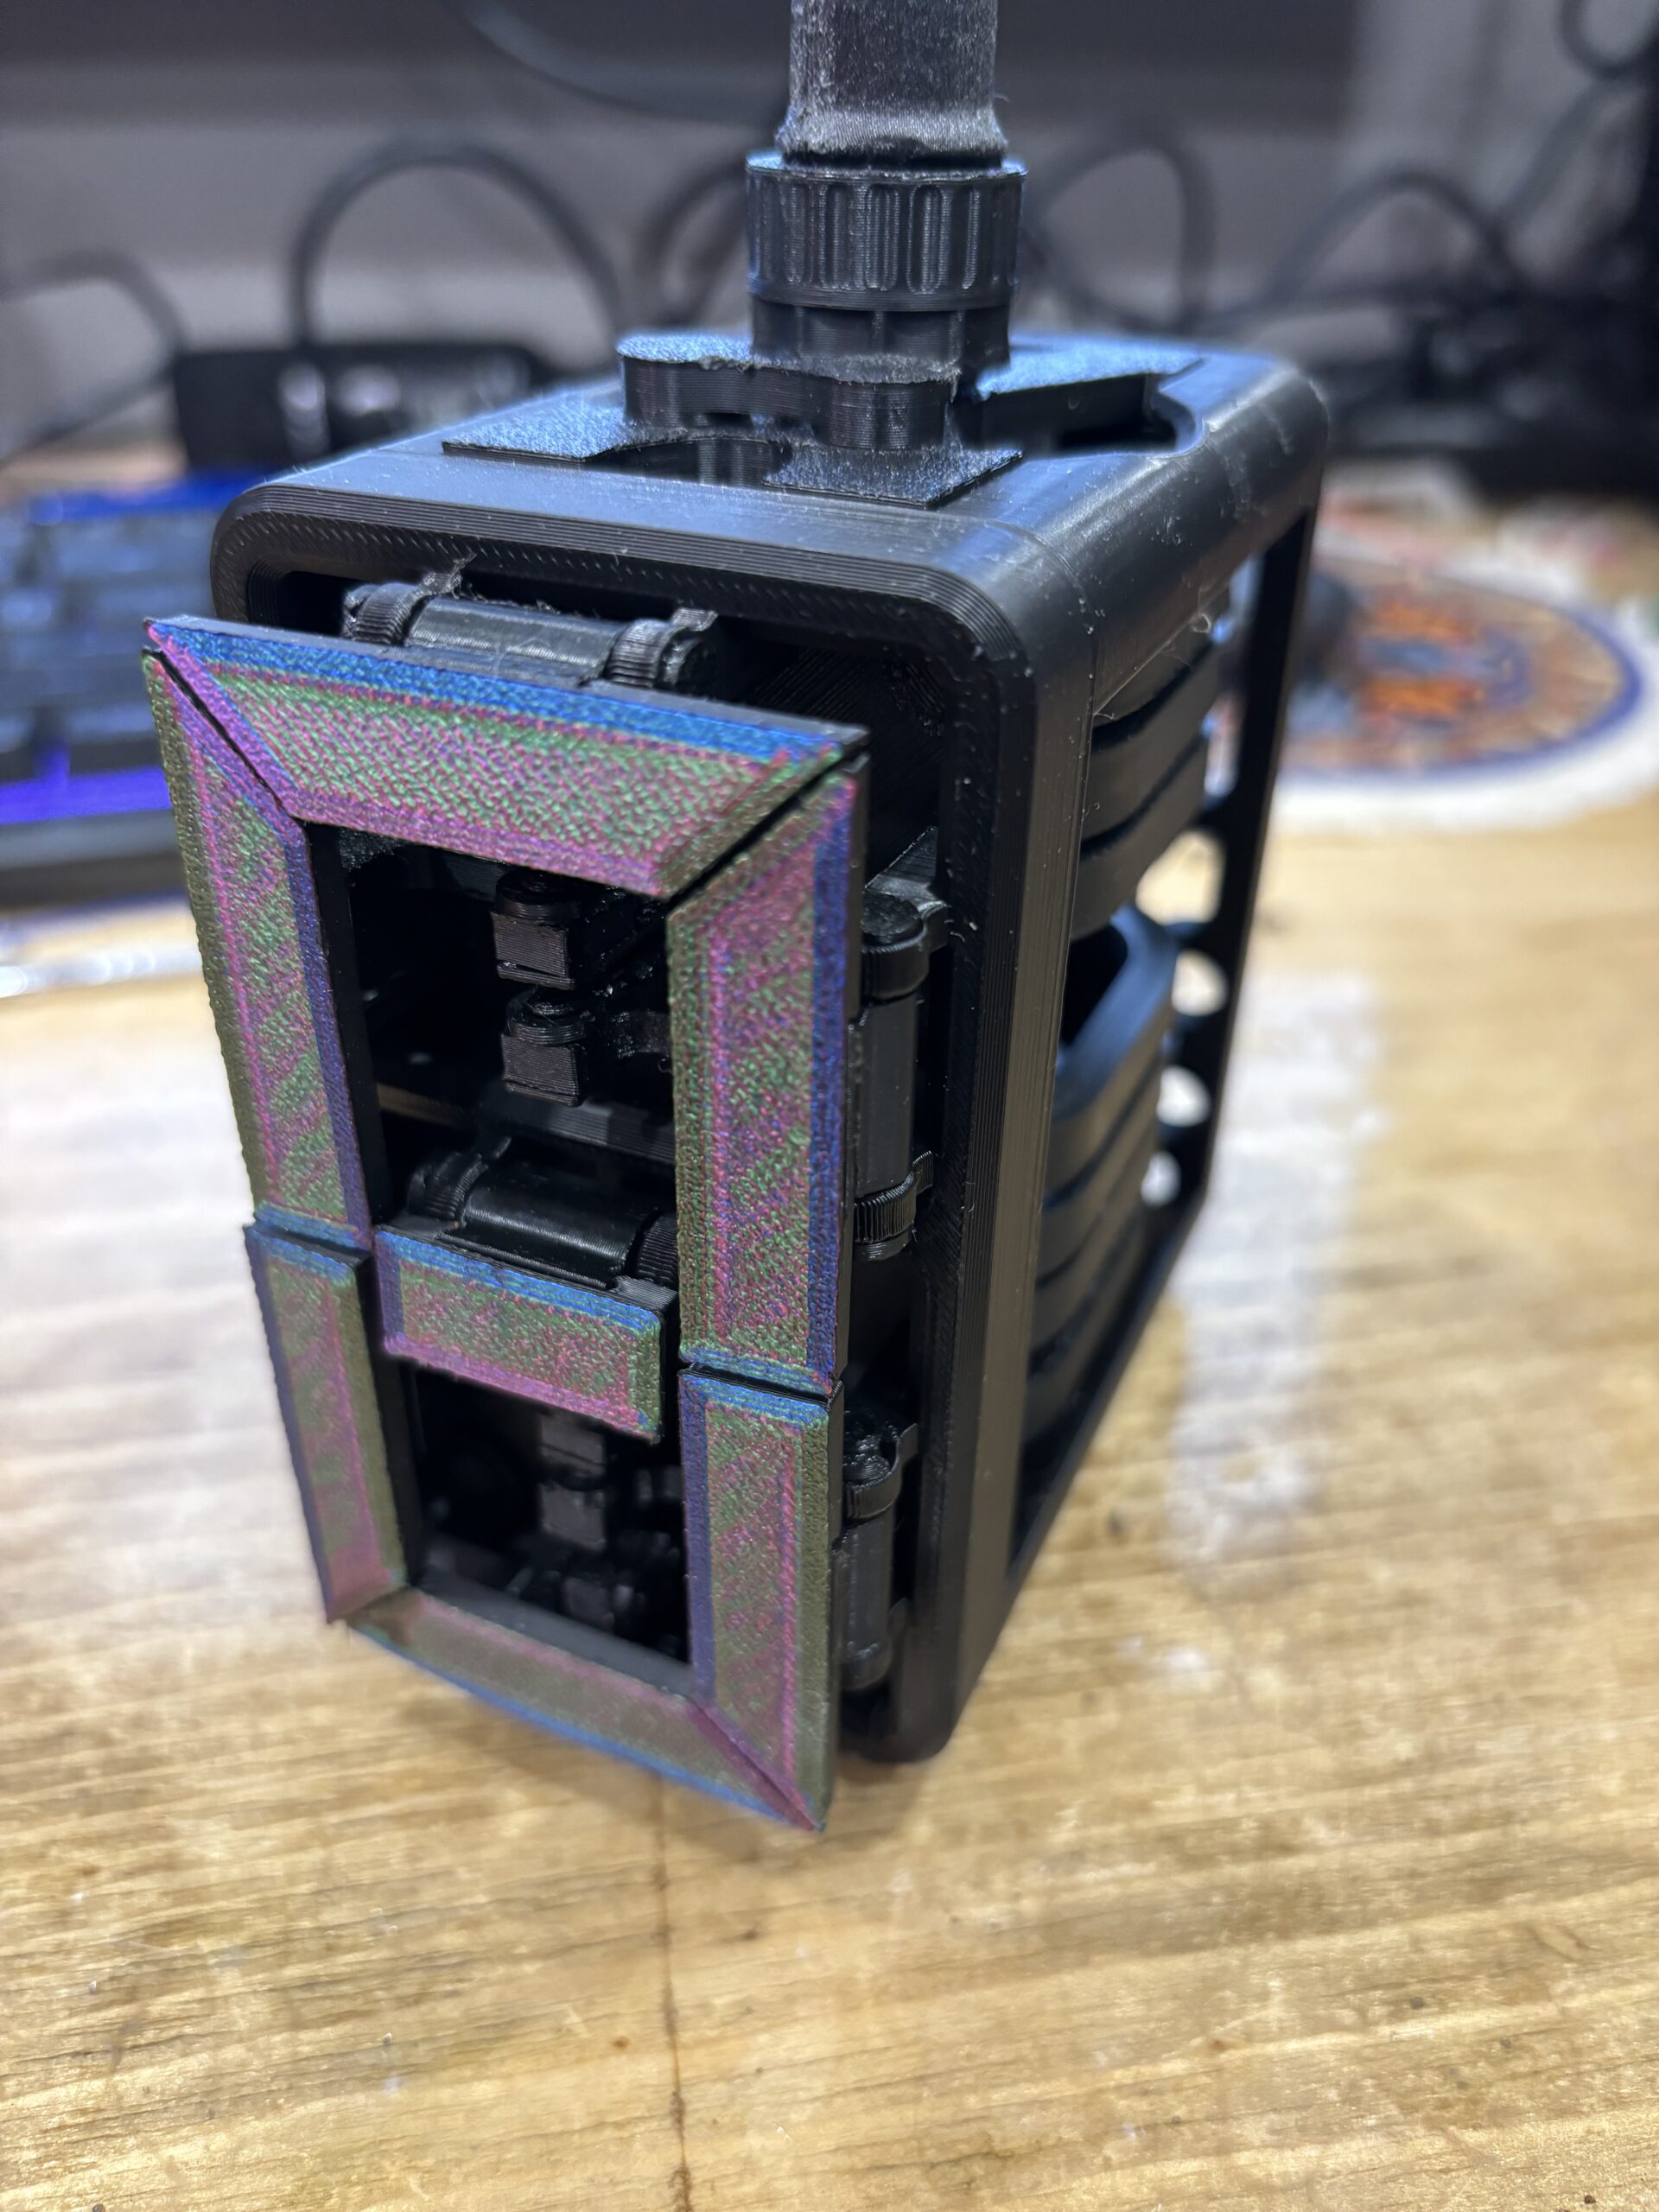
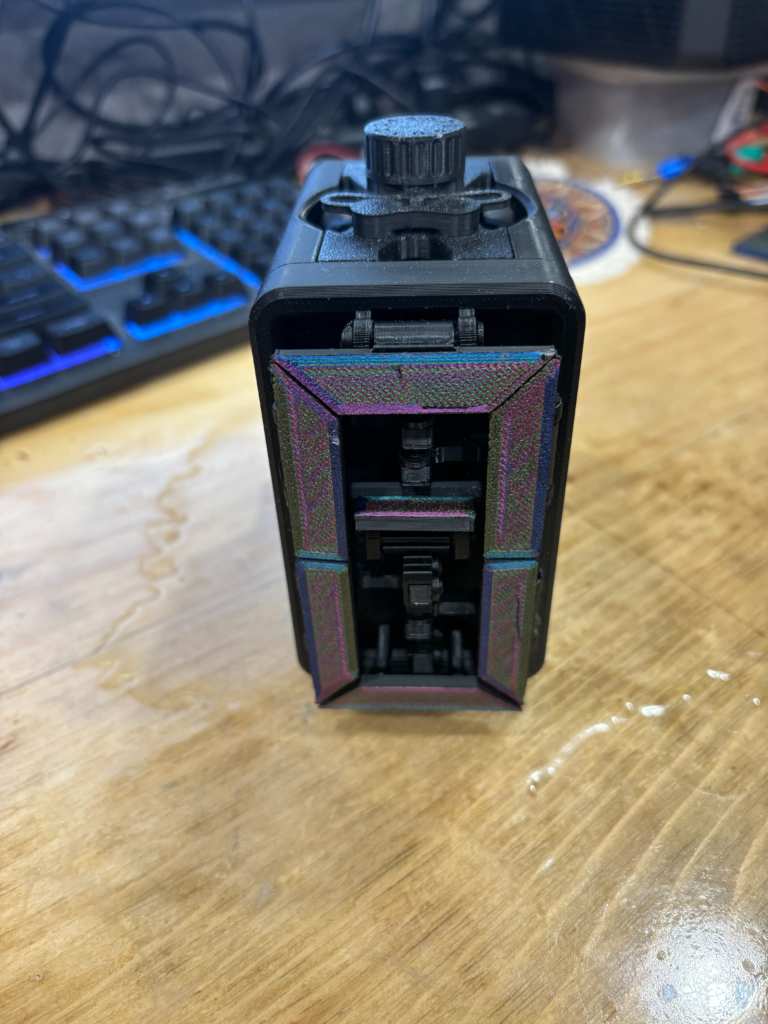
But that’s not good enough to make a mechanical display like this one;
https://thangs.com/designer/Engineezy/3d-model/Rack%20Driven%207%20Segment%20Display-1050502
As soon as I saw a video about this design, I knew I was going to spend some time making them. But oh boy, was it frustrating at times.
Goals:
Make a seven-segment display and throw a servo on it. Then do something else with it. Probably make a dice roller. Maybe a clock?
Attempt # 1
I had to print this one on five plates, as the smaller cam parts had some failures that needed to be reprinted.
That being said, it worked! Just not very well. When assembling it, everything seemed nice and loose, but the cam does not turn smoothly and tends to jam constantly. Ignoring these issues, I slapped a servo onto the back of it, which immediately stripped the printed gears on the servo.
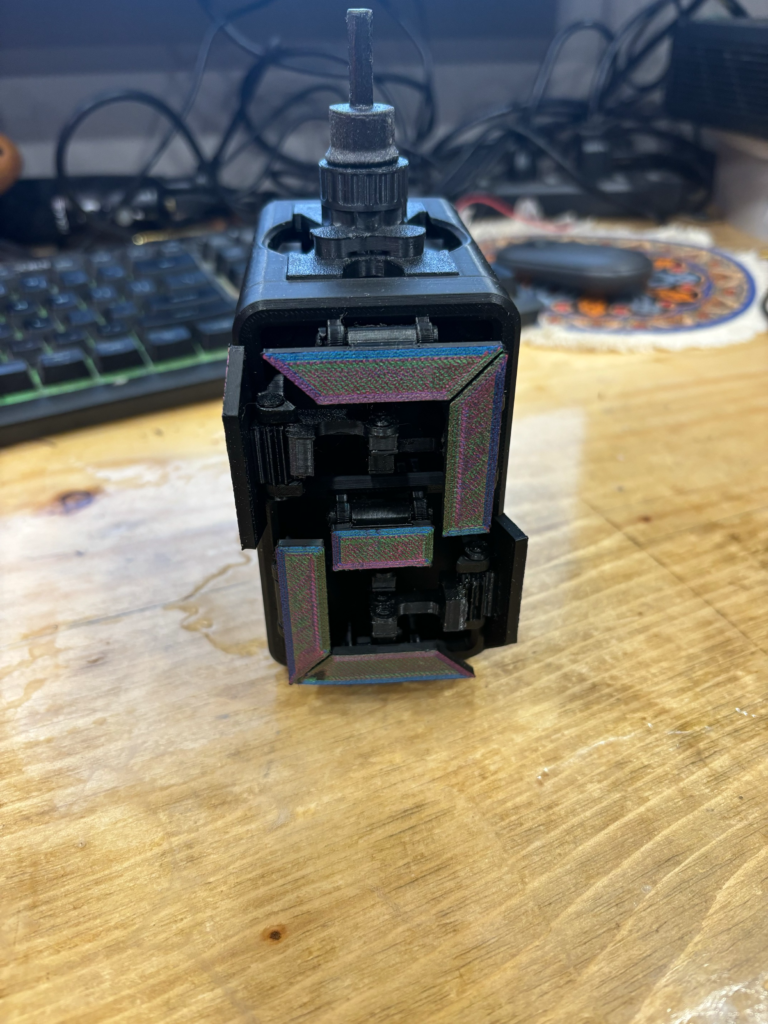
The little rod on the dial was so I could turn the cam with a drill, hoping to wear the cam in so it turns better. This works well on fidget spinners and the like, but it didn’t help here.
Attempt 1 – Half successful, but not really.
Attempt # 2
I printed this one out on the standard three plates, but when assembling it, I used superlube on all the moving parts. This resulted in much smoother operation, but it would still jam occasionally.
The servo still refused to move anything reliably, and I found the issue to be with the servo mount.
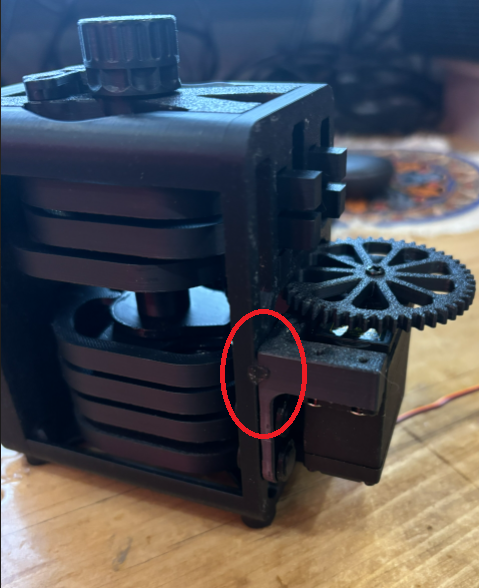
The pins holding this part of the mount have too much slack, so I tried supergluing them together to see if that helped.
Unfortunately, I used super glue from a brand-new bottle that was too thin. It spurted out everywhere and froze half of the parts in place. Oh, the bittersweet taste of failure.
Attempt 2 – Death by CA Glue
Attempt # 3
Ok, now it’s time to get serious. I’m obviously having issues printing parts that fit together with low tolerances. So it’s time to do something I’ve never wanted (and still don’t) to do. Tune my printer.
These were all printed off on this beast;
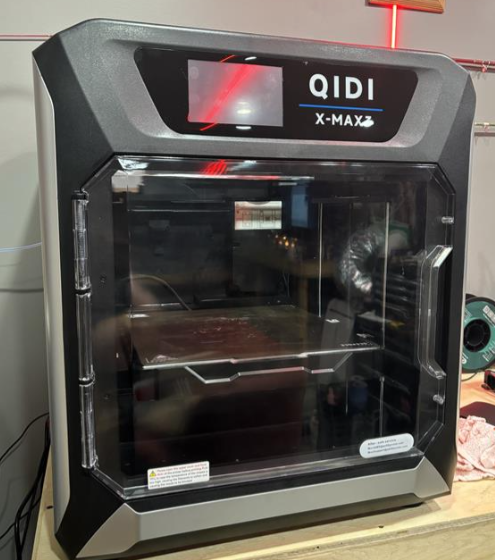
I originally bought this big MFer to replace my CR-10S for printing off large objects, but its speed and ease of use have turned it into my favourite of the five FMD printers I currently run (it does have some significant flaws, I’ll eventually do a review on each of the printers I have)
That being said, I have never needed to tune it.
To be continued…